
Most problems in a pipe start before the match is struck. A bowl that goes out every two minutes, a smoke that bites the tongue, a draw that feels like sucking through a coffee stirrer: nearly all of it traces back to how the tobacco went in.
The fix is simple, and it has been taught in tobacco shops for generations. It is called the three-step method, and it works with almost any pipe and any loose tobacco.
This guide walks through each step, the draw test, the charring light and the true light. It also covers the other pipe packing techniques worth knowing, how to adjust for different bowl sizes, and how to fix the most common problems.
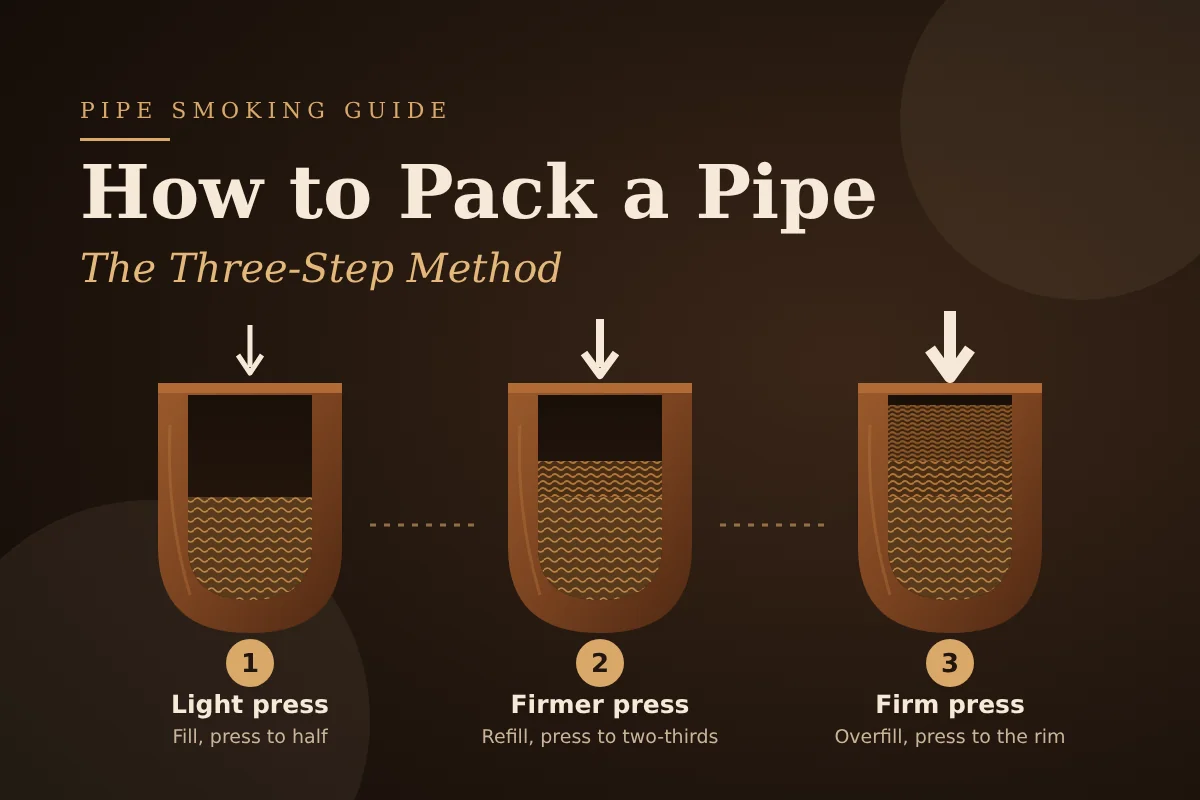
Quick answer: Fill the bowl loosely and press it down to about half full with very light pressure. Fill again and press a little firmer, to about two-thirds full. Fill a third time and press firmly until the tobacco sits just below the rim. Test the draw. It should feel like drinking through a straw, with slight resistance. Then give it a charring light, tamp, and relight.
What You Need Before You Pack a Pipe
You do not need much. The essentials are:
- A clean, dry pipe. Any ash or damp dottle left from the last bowl will block airflow.
- Loose pipe tobacco at the right moisture. More on this below.
- A tamper. A dedicated tamper, the flat end of a pipe tool, or even a blunt pencil end works.
- Matches or a soft-flame lighter. Wooden matches and soft yellow-flame lighters are kinder to the rim than a torch.
- Pipe cleaners. For clearing moisture and blockages mid-bowl.
If you are new to the hobby, a corncob pipe is a cheap, forgiving way to learn. It needs no break-in period and tolerates packing mistakes better than a new briar.
Check Your Tobacco's Moisture First
Moisture changes everything about how tobacco packs. Before you load the bowl, pinch a small amount between your fingers.
- Too wet: it feels sticky, clumps together and leaves residue on your fingers. Wet tobacco compresses too easily, resists lighting and steams in the bowl.
- Too dry: it crumbles and feels crisp. Dry tobacco burns fast and hot.
- Right: it feels springy, holds together when squeezed and slowly opens back up when released.
If your tobacco is too wet, spread it on a paper towel for 15 to 30 minutes. If it is too dry, it needs time in a sealed jar with a humidity pack. We describe the same storage method in how to store Backwoods, and it applies to loose pipe tobacco too.
The Three Step Pipe Packing Method, Explained
The three step pipe packing method builds the bowl in layers. Each layer is pressed with more force than the one below it. The result is a loose bottom, a medium middle and a firm top.
That gradient matters. The loose base lets air move freely through the bowl. The firm top gives the flame an even surface to light across. Together they create an even, cool burn from top to bottom.
Older tobacconists described the pressure as the touch of a child, then a firmer hand, then a full adult press.
Step 1: Fill Loosely and Press Lightly
Take a pinch of tobacco and let it fall into the bowl. Keep adding until the bowl is full to the rim and slightly mounded. Do not push it down yet.
Now press gently with your finger or tamper. Use very little force. The tobacco should compress to roughly half the bowl's depth.
The goal here is a springy base. If you press too hard on this first layer, the bottom of the bowl will choke the airflow for the whole smoke.
Step 2: Refill and Press a Little Firmer
Fill the bowl back to the rim with loose tobacco. Press again, this time with moderate pressure, about twice the force of the first step.
The tobacco should now sit about two-thirds of the way up the bowl. When you lift your finger, the surface should push back slightly. That springback is a good sign.
Step 3: Overfill and Press Firmly
Fill the bowl a final time, letting the tobacco mound above the rim. Press firmly this time. The surface should end up level with the rim or just below it, about an eighth of an inch.
The top should feel like a soft, springy cushion, not a hard puck. Any loose strands hanging over the rim can be tucked in or brushed off. Stray strands catch fire first and can scorch the rim.
Test the Draw
Before lighting, put the pipe in your mouth and draw air through it.
- Right: slight resistance, like drinking a thick shake through a regular straw.
- Too tight: you struggle to pull air. Empty the bowl and start again with lighter pressure.
- Too loose: air flows with no resistance at all. Add another pinch on top and press.
This test answers how tight to pack a pipe better than any written rule, because every bowl shape and tobacco behaves a little differently. Your draw is the real measurement.
If the draw is tight, run a pipe cleaner through the stem. If that does not help, dump it and repack. It is faster than fighting a choked bowl.
Lighting: The False Light and the True Light
A packed pipe is only half done. How you light it decides whether the three steps pay off.
The Charring Light
The first light is often called the false light. It is the charring light pipe smokers rely on to set the surface before the real smoke begins.
Hold the flame just above the tobacco, not on it. Draw gently while moving the flame in a slow circle over the whole surface. The tobacco will swell and rise, and some strands will curl up. That is normal.
The charring light does not need to stay lit. Its job is to dry and set the top layer.
Tamp, Then Relight
Once the charring light settles, use your tamper to press the surface back down gently. This flattens the curled, charred strands into an even layer.
This is the moment to learn how to use a pipe tamper properly:
- Press straight down, not at an angle.
- Use light pressure. You are leveling the ash, not compressing the bowl.
- Cover as much of the surface as the tamper allows, then move it once or twice to reach the edges.
Now apply the true light. Move the flame over the surface again while drawing slowly. This time the tobacco should catch evenly and stay lit.
Keep It Lit With a Slow Pace
A slow, steady rhythm keeps the ember alive without overheating it. Many smokers aim for a gentle puff every few seconds.
Tamp lightly whenever the ash builds up or the ember starts to fade. A few light tamps through the bowl keep the burning tobacco in contact with the fresh leaf underneath.
Other Pipe Packing Techniques Worth Knowing
The three-step method is the standard, but it is not the only option. These pipe packing techniques suit different tobacco and preferences.
The Gravity Fill
Sprinkle tobacco into the bowl, letting it fall in under its own weight. Tap the bowl gently against your palm so the tobacco settles. Repeat until the bowl is full, then give a single light press on top.
The gravity fill creates a very open bowl. It suits fine ribbon cuts and smokers who prefer an airy draw, though it can burn faster.
The Frank Method
Take a generous pinch of tobacco, larger than the bowl opening, and lay it over the top of the bowl. Push the center down into the chamber with your thumb, folding the edges in around it. Then press firmly until it sits just below the rim.
This leaves a loose pocket at the bottom and a firm cap on top. It is fast, usually done in one or two moves, and it works well with medium ribbon and broken flake.
Folding and Stuffing Flake
Pressed flake tobacco can be rubbed out and packed like ribbon, or folded in half, folded again and pushed into the bowl whole. Folding gives a slower, cooler burn but needs more relights early on. Our guide to pipe tobacco cuts explained covers flake, plug, rope and cube preparation in full.
How to Pack Ribbon Cut Tobacco
Ribbon cut is the most common cut in American pipe tobacco. It is the cut you will find in almost every budget bag in our pipe tobacco collection, including Good Stuff, OHM, 4 Aces, Gambler, Golden Harvest, Kentucky Select, Cheyenne, Golden Leaf and Largo.
If you want to know how to pack ribbon cut tobacco, the three-step method is the right answer, with three adjustments:
- Go lighter on pressure. Ribbon strands compress more than pressed cuts, so the same force packs them tighter.
- Fluff it first. Tobacco from the bottom of a bag often clumps. Tease it apart with your fingers before loading.
- Puff slower. Thin strands burn fast and heat up quickly, so a calm pace matters more than with flake.
Good Stuff Blends and How They Pack
Every Good Stuff blend uses the same ribbon cut. What changes is the leaf recipe and the casing, which we break down in Good Stuff tobacco colors explained. Because the cut is shared, they pack the same way, but they do not all behave the same in the bowl.
| Blend | Packing note | Sizes |
| Good Stuff Red | Full flavor, burley-forward. Keep the top layer firm and puff slowly to avoid heat. | 2 oz, 6 oz, 16 oz, 5 lb |
| Good Stuff Gold | Lighter blend, same casing as Red. Standard three-step pressure. | 2 oz, 6 oz, 16 oz |
| Good Stuff Silver | Mildest. Easy to keep lit, a good blend to practice the method with. | 6 oz, 16 oz, 5 lb |
| Good Stuff Natural | No casing, dries fastest. Check moisture before every bowl. | 6 oz, 16 oz, 5 lb |
| Good Stuff Menthol | Strong cooling. Pack as standard; menthol does not change the cut. | 2 oz, 16 oz, 5 lb |
| Good Stuff Menthol Gold | Gold blend with softer menthol. Standard pressure. | 6 oz, 5 lb |
Good Stuff Natural deserves a special note. Without humectants, it loses moisture faster than any cased bag, so it can go from perfect to crisp in a few days if the bag is left open. Our guide to additive free tobacco and Good Stuff Natural explains why.
Menthol and Menthol Gold are restricted in some states and cities, so check local rules before ordering either one.
Adjusting for Bowl Size and Shape
The three steps stay the same in every pipe, but the amount per layer and the pressure shift with the bowl.
Pack a Pipe With a Small Bowl or Corncob
Small bowls fill quickly, so each layer is only a pinch or two. Use lighter pressure than you would in a larger briar, because a narrow chamber has less room for air to move.
Fine ribbon and broken flake suit small bowls best. Mild blends like Good Stuff Silver are the easiest to keep lit in a corncob.
Pack a Pipe With a Large or Tall Briar
Deeper bowls need more tobacco per layer and a little more attention to the bottom. If the base is too loose in a tall chamber, the bowl can collapse halfway through the smoke.
Some smokers add a fourth light layer in very tall bowls. The principle does not change: loose at the bottom, firm at the top.
Common Problems When You Pack a Pipe
Even with good technique, some bowls misbehave. Here is how to read the signs.
When Your Pipe Keeps Going Out
If your pipe keeps going out, the cause is usually one of three things:
- Packed too tight. Not enough air reaches the ember. Run a pipe cleaner through the stem, or loosen the top gently with a pick.
- Tobacco is too wet. Moisture smothers the burn. Let the next batch air-dry before packing.
- Too much tamping. Pressing hard mid-bowl crushes the airflow you built.
When Your Pipe Tobacco Is Burning Hot
Pipe tobacco burning hot causes tongue bite, a sharp, stinging feeling that can last for hours. The usual causes are:
- Packed too loose. Air rushes through and the ember flares.
- Puffing too fast. Rapid puffs drive heat up into the stem.
- Tobacco is too dry. Dry ribbon burns like kindling.
The fix is to slow down. Set the pipe down for a minute if the bowl feels hot in your hand. Then tamp lightly and resume at a calmer pace.
How to Smoke a Pipe for Beginners
Packing is the first skill. Once you have it, the rest of how to smoke a pipe for beginners comes down to pace and patience.
- Do not inhale. Pipe smoke is drawn into the mouth and released. The flavor is in the mouth and nose, not the lungs.
- Start mild. A mild blend at the right moisture is far easier to learn on than a strong, dark tobacco.
- Expect relights. Even experienced smokers relight a few times per bowl.
- Let the pipe rest. A tobacco pipe made of briar needs a day to dry between smokes.
- Clean after each bowl. Knock out the ash once cool, run a pipe cleaner through the stem, and let it dry.
Strength comes from the leaf more than the method. Burley-heavy blends hit harder than Virginia-forward ones. Our guide to cigar strengths explained walks through the same leaf logic, and OHM Turkish Yellow vs Turkish Red shows how one leaf change shifts a ribbon blend.
Pipe Tobacco and Rolling
Ribbon pipe tobacco looks like cigarette tobacco, but it is cut wider, cased heavier and blended differently. We cover the details in can you roll pipe tobacco into cigarettes and roll-your-own tobacco brands.
Good Stuff is labeled and sold as pipe tobacco, so use it as the package directs. If you prefer tobacco made for tubes and papers, Bugler sits in our roll-your-own collection, alongside rolling papers, cigarette tubes and wraps.
When a Pipe Is Not Practical
A good bowl takes time: a few minutes to load, plus 30 minutes or more to smoke. That does not fit a commute, a work shift or a flight.
Many pipe smokers keep a smokeless option for those hours. ZYN nicotine pouches contain no tobacco leaf, so there is nothing to pack, light or tamp. You place a pouch under your upper lip and it releases nicotine without smoke or spitting.
- Labeled strength: ZYN comes in 3 mg and 6 mg pouches. Pipe tobacco carries no printed nicotine figure.
- Flavor range: pouches can carry flavors a pipe cannot, as covered in our ZYN Black Cherry, Peach and Dragonberry review.
- Simple use: our guide on how to use VELO nicotine pouches covers placement and timing, and the same steps apply to ZYN.
Other options in our smokeless tobacco collection cover the same need.
Pipe smokers who also enjoy cigars usually find mild cigars the easiest crossover.
FAQs
How do you fill a tobacco pipe for the first time?
If you are wondering how to fill a tobacco pipe for the first time, use the three-step method: fill loosely and press to half, refill and press to two-thirds, then overfill and press firmly to the rim. Test the draw before lighting.
How tight should pipe tobacco be packed?
Tight enough that the draw has slight resistance, like a straw in a thick drink. If air flows freely, it is too loose. If you struggle to draw, it is too tight.
Why does my pipe tobacco keep going out? Most often the bowl is packed too tight, the tobacco is too wet, or the bowl was tamped too hard mid-smoke.
What is a charring light?
A first, light pass of the flame that dries and sets the surface. You tamp the curled tobacco flat afterward, then apply the true light.
Do I need a pipe tamper?
A tamper makes the job easier, but the flat end of a pipe tool or a blunt pencil end works too. Avoid using your fingertip once the bowl is lit.
Is pipe tobacco safe?
No tobacco product is safe. Pipe tobacco contains nicotine, which is addictive, and it is for adults 21 and over only.
Summary
The three-step method is the most reliable way to pack a pipe: a loose base, a firmer middle and a firm, springy top just below the rim. Test the draw before lighting, use a charring light to set the surface, tamp it flat, then apply the true light and keep a slow pace. Most problems, from a bowl that keeps going out to a hot, biting smoke, come back to pressure and moisture, so adjust one at a time. Ribbon cut blends like Good Stuff are the easiest to learn on, the 2 oz bags let you practice before committing to a larger size, and ZYN covers the hours when a pipe is not an option.
What did you think?
Share this article
Help others discover this content by sharing it with your network.